In this article I have documented the steps I have taken to setup and configure both my ICOM IC-7300 and WSJT-X software for FT8 data mode operation.
Click on the continue button to see more.
IMPORTANT NOTE: If this is the first time you are connecting your ICOM transceiver to a computer do not connect the USB lead before installing the ICOM USB driver.
I am using Windows 10 operating system. If you are installing on a different operating system some parts of this process may be different.
INSTALLING THE ICOM USB DRIVER
Below is a link to the installation guide that explains the process for installing the ICOM USB driver on different operating systems. It is important you read this before downloading and installing the driver.
https://www.icom.co.jp/world/support/download/manual/disp_products.php?ID=20130723001
After you have familiarised yourself with the installation process, download the ICOM USB driver software from the link below.
https://www.icom.co.jp/world/support/download/firm/IC-7600/usb1_20/
After the software download is complete, run the software and follow the installation process.
CONNECT YOUR PC AND ICOM 7300 USING USB CABLE
Now the driver is installed you can connect your ICOM IC-7300 to your computer using a USB A to USB cable (1.1, 2.0, or 3.0).
CHECK COM PORT ASSIGNED TO ICOM USB DRIVER
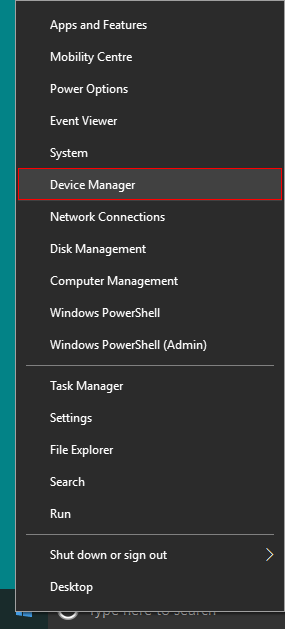
Right click on Windows ‘Start’ button.
Click on ‘Device Manager’.
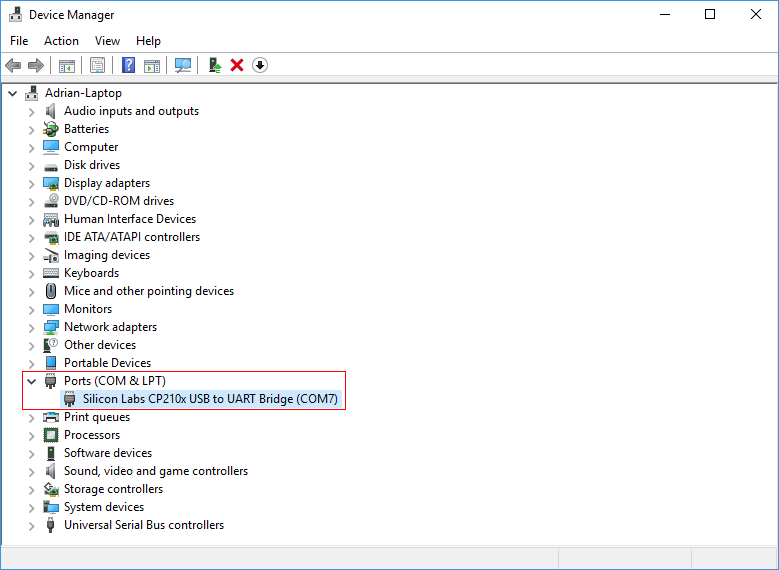
Click on ‘Ports (COM & LPT) to expand. If the ICOM USB driver has installed correctly and the ICOM IC-7300 is communicating with your PC you will see ‘Silicon Labs CP210x USB to UART Bridge (COMX), where X is the assigned port.
Make a note of this port number as you will need it later for WSJT-X configuration.
INTERNET TIME SYNCHRONISATION
FT8 and other data modes require your computer’s internal time clock be set precisely. Even if it’s out by a second or two it may result in you unable to make QSO’s.
To ensure my computer clock is kept up to date I have installed ‘Meinberg NTP‘.
Information about this software can be found here http://www.satsignal.eu/ntp/setup.html
Software can be downloaded from here https://www.meinbergglobal.com/english/sw/ntp.htm#ntp_stable
DOWNLOAD AND INSTALL WSJT-X
Find the latest version of WSJT-X at this URL: http://pulsar.princeton.edu/wsjtx.html
At the time of writing there had been some enhancements to FT8 and MSK144 protocols and as such these were not backward compatible with older versions of WSJT-X. These new protocols because the world-wide standard from 10th December 2018 and all users were asked to upgrade to WSJT-X 2.0 by 1st January 2019. This will be the version I will be installing now.
There are options for both Windows and Linux. I will be installing the Windows 10 supported version.

Click on wsjtx-2.0.0-win32.exe or equivalent and download.
After the download has completed, run the executable and install WSJT-X. When prompted, tick the box to ‘Create wsjtx Desktop Icon’.
CONFIGURE ICOM IC-7300 FOR DATA MODE OPERATION
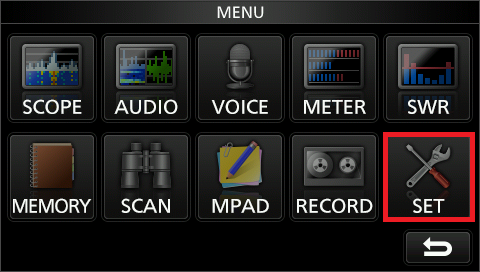
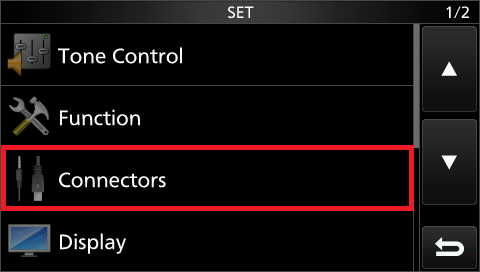
Click on the ‘MENU’ button and press ‘SET’.
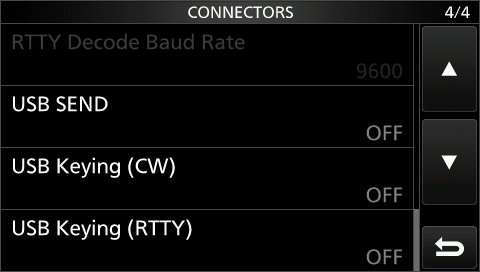
Press ‘Connectors’.
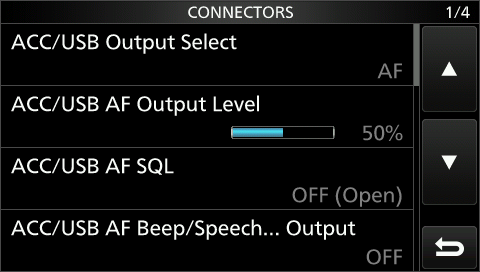
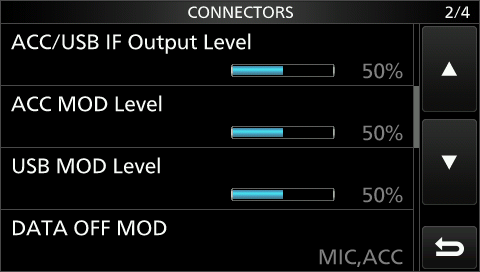
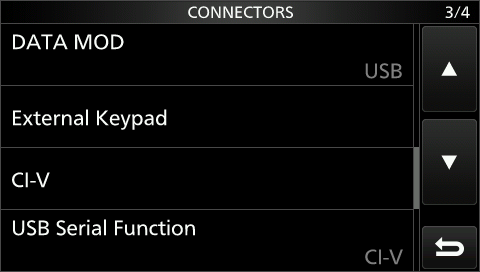
Using the up and down arrow, scroll through each of the windows below and change to the same settings.
After you have finished changing the settings press the ‘EXIT‘ button on the radio to return the to the main screen.
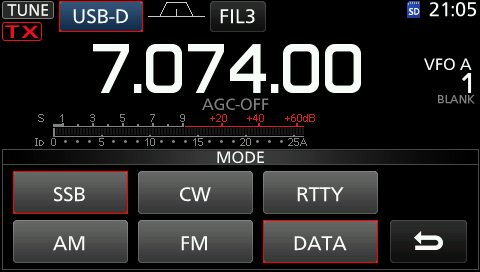
SET ICOM 7300 TO USB-D MODE
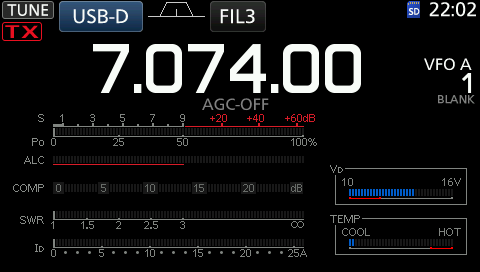
For FT8 you will need to use ‘USB-D‘ mode. This ensures the ‘DATA MOD‘ value of ‘USB‘ (USB interface) is used (see above). Set mode by pressing the mode i.e. ‘USB-D‘ and pressing ‘SSB‘ to toggle between ‘USB‘ and ‘LSB‘ and ‘DATA‘ to toggle between ‘USB-D‘ and ‘LSB-D‘.
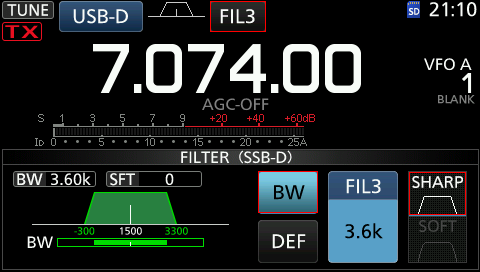
SET ICOM 7300 USB-D BANDWIDTH
I set my bandwidth to 3.60kHz for filter 3 by pressing and holding the filter button until the filter options open in the window. I press ‘BW‘ and use the main tuning knob to change the bandwidth. I press ‘SHARP‘ before pressing and holding the filter button until the filter options close.
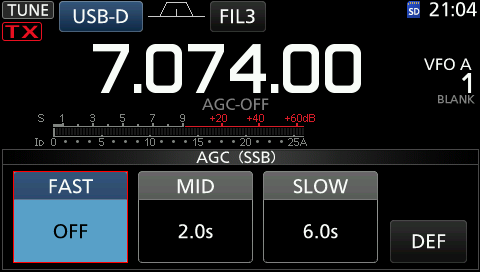
SET ICOM 7300 AGC
For data modes I turn off Active Gain Control (AGC). I do this by pressing the ‘FUNCTION‘ button, pressing ‘FAST‘ and using the main tuning knob to select ‘OFF‘.
SET ICOM IC-7300 METER TYPE
When operating data modes I use the meter view.
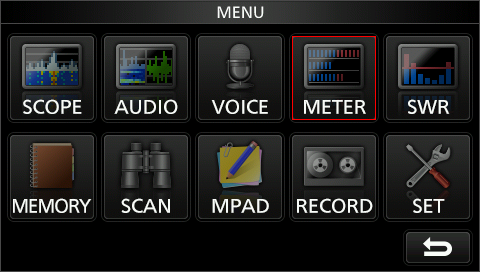
Press the ‘MENU‘ button and click on ‘METER‘.
Besides other things I am now able to view output power, ALC and SWR.
CONFIGURE WSJT-X
Open the WSJT-X software. If you chose the option to ‘Create wsjtx Desktop Icon’ you can do this by double clicking the WSJT-X icon on the desktop.
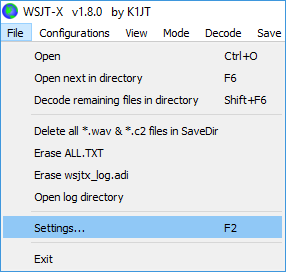
Click on ‘File‘ then ‘Settings‘.
In the ‘General‘ tab input your callsign, grid square and IARU region. If you don’t know your grid square use WhatsMyLocator to find it. Details about IARU can be found here.
Other settings in this tab are my preferred settings.
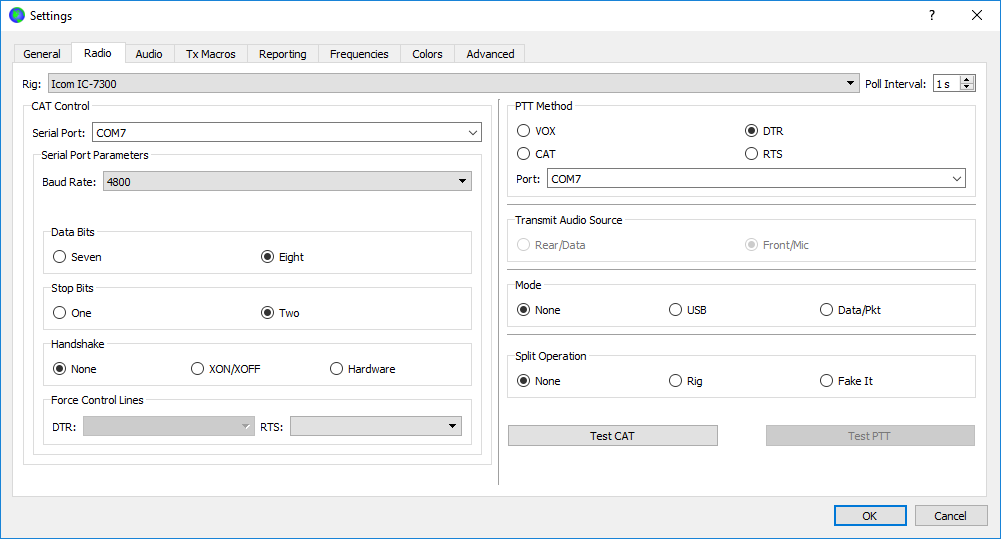
Click on the ‘Radio‘ tab.
Click on the ‘Rig‘ dropdown and select ‘Icom IC-7300‘.
Click on ‘Serial Port‘ dropdown and select the COM port to which the ICOM USB driver was assigned and which you made a note of earlier.
Click on ‘Baud Rate‘ dropdown and select ‘9600′.
Click on the ‘CAT‘ radio button.
Set other radio buttons as per screenshot below.
If you click on the ‘Test CAT‘ button you should now hear your ICOM IC-7300 momentarily key.
Click on the ‘Audio‘ tab.
Check the Soundcard ‘Input‘ is using the ‘USB Audio CODEC’. If it isn’t, click on the dropdown and select it.
Click on the ‘Audio‘ tab.
Check the Soundcard ‘Output‘ is using the ‘USB Audio CODEC’. If it isn’t, click on the dropdown and select it.
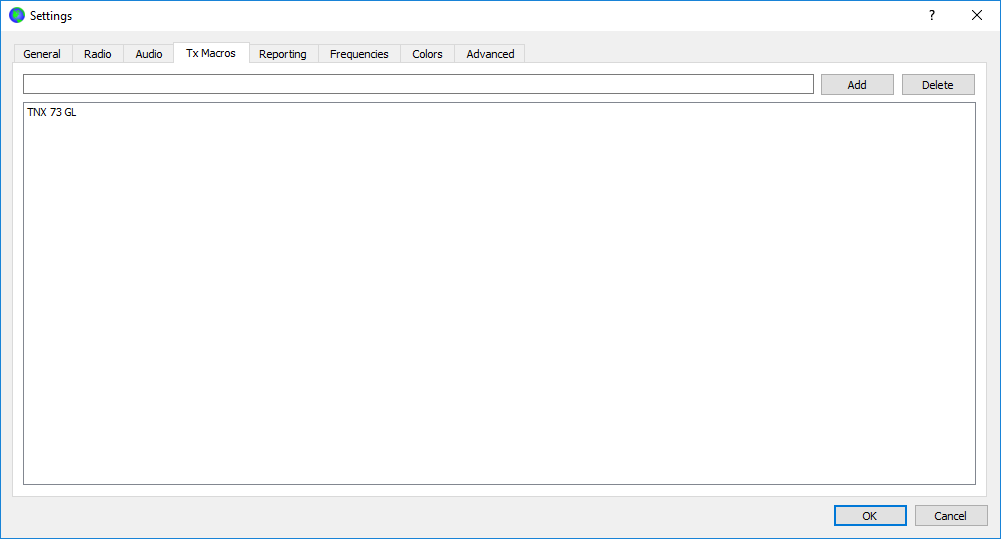
Click on the ‘Tx Macro‘ tab.
I have made no changes to settings in this tab.
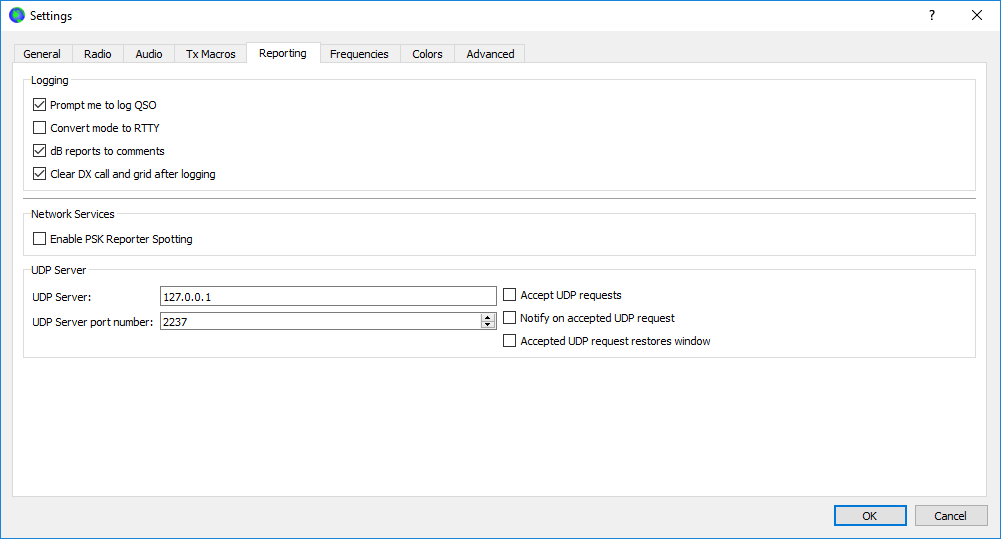
Click on the ‘Reporting‘ tab. ‘
The ‘Logging‘ section contains my preferred values. All other values are default.
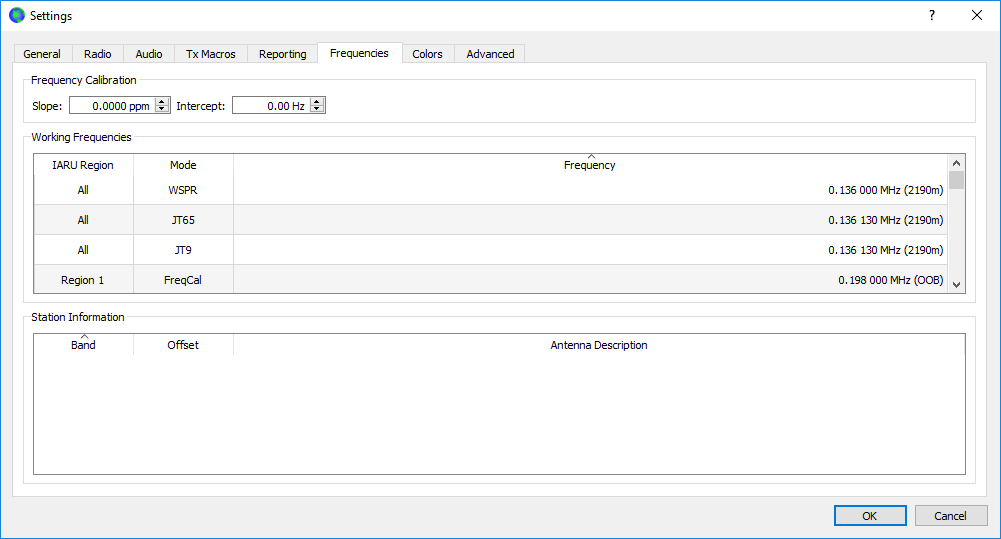
Click on the ‘Frequencies‘ tab.
I have made no changes to settings in this tab.
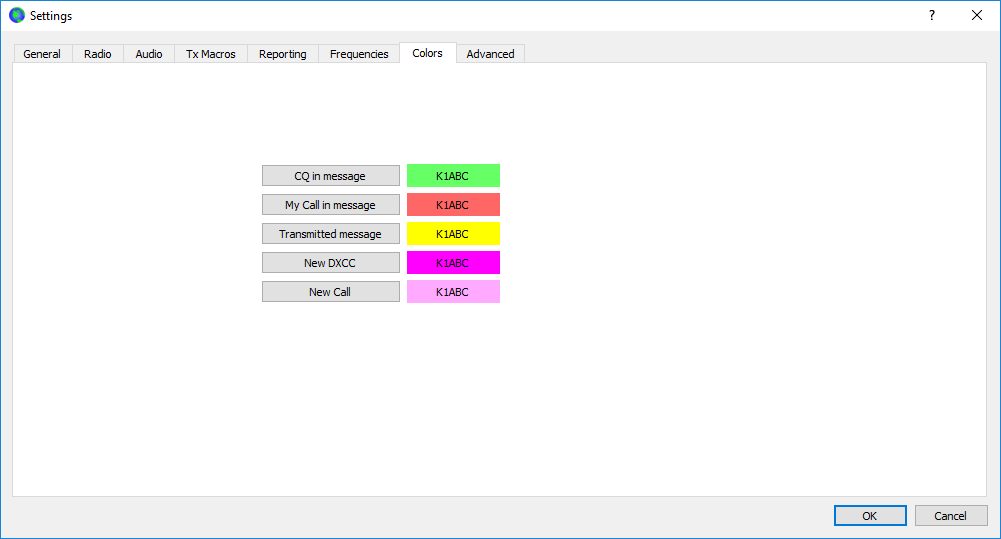
Click on the ‘Colours‘ tab.
I have made no changes to settings in this tab.
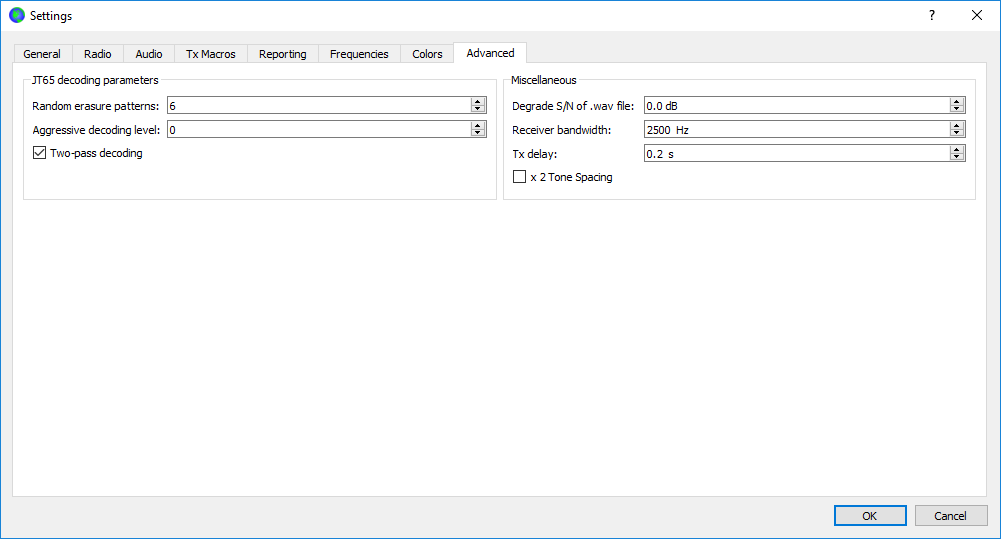
Click on the ‘Advanced‘ tab.
I have made no changes to settings in this tab.
Click the ‘OK’ button to save your changes.
Why not take a look at my YouTube channel here or Twitter posts here.
You can also register for my website here.
Thanks
73 de M0NWK



28 comments
Adrian– Thanks for taking the time to make the above tutorial. It is just what I needed. Ken, K4RET, Lancaster, Virginia
Hi Ken, no problem at all. Glad you found it useful. Thank you & 73 Adrian
thans for the conseil
merci beaucoup pour les conseil ..
c’est best
Hi Adrian, many thanks for your excellent tutorial. It was a real help for me to set of FT8 on my 7300. Hopefully we will have a qso.
Many Thanks
73
Dl1MWZ Martin
Hi Martin, thank you very much for your kind comments. Glad it helped you. Kind regards and 73 Adrian
Hi Adrian, thanks for this. I used FT8 for a few months now, but the wider filter setting from your instructions make things even better!
Hi Matt, thanks for your message. Pleased you found it useful. Thanks and 73. Ade
Thank you very much for taking the time to put this together. For some reason.every time I get all of my setting done they change all by themselves.
Dave Reynolds N7WKX
Hi Dave, thanks for your kind comments. I’m pleased you found it useful. Cheers and 73. Ade
Thank you for the great tutorial on the IC-7300 and using it on FT8. I learned several valuable points watching it. Best to you and yours.
73
Bob Smith
Thanks a lot for your kind comments Bob. Pleased you found it useful. Kind regards & 73. Cheers Ade
Excellent tutorial. Saved me an hour. 73 de GW4RER
Pleased it helped you Chris. Thanks for your kind comments. 73 Ade
Adrian i purchased my ic-7300 at the end of november and still not been able to set it up so will be following this process page by page and hopefully get it set up correctly this week just want to check i use the usb for connection think its called the AtoB so are these settings still ok thank you Dave M3XIE
Hi Dave, yes it is USB A to B. Exactly the same settings. Thanks for commenting and good luck. Thanks and 73. Ade
Hi Adrian just a quick update i have succesfully got the radio sending out signals only using a ground mounted cp6 has ive got get a new pole for the long wire my signals are being seen on psk reporter but no one is coming back to me do you have any more suggestions i did think about reinstalling the drivers again your opinion is appreciatedthank you again Dave M3XIE
Thanks! Do you know where I can find info about what all all the 7300 settings “mean”… it’s one thing to follow your guidance but another to know what I’m actually doing and why.
Thanks again.
That’s a good point. When I write my blog articles I normally try to explain this but this one not so much.
I will take a look and look to enrich with some further info.
Meanwhile, the 7300 manual if you have it or there are some YouTube videos that explain this.
I intend on doing quite a few YouTube videos on my blog subjects and more so if you want to subscribe please do so. Search M0NWK in YouTube.
Thanks and 73
Adrian – M0NWK
Thanks for the full detail to get running on FT8, my new rig, IC7300, has been presenting a problem but all is fine now, many thanks, Ray
Hi Ray, pleased you found it useful and that you are up and running. Thanks for commenting. All the best and 73. Ade
Question been using HRD and WSJT-x for months now but now when I start HRD that works fine but when I then start WSJT-X the frequency is red out and nothing works. Any suggestions?
PS I changed nothing in the Icom 7300. If I Use WSJT-x alone it works fine as soon as I change the radio from Icom 733 to Ham Radio Deluxe it doen’t wor..
Sam WA2EPI
Hi Sam,
Thanks for your message and apologies for the delay. Sorry I don’t use HRD and can’t suggest anything you can try. You could try the Facebook groups.
Kind regards & 73
Adrian
Great thanks! This is just what I looking for!
de HL3BiX, TU OM 73
Hi, thanks for your comments and pleased you found it useful. Apologies for late reply. Been really busy. Thanks and 73 – Ade
Muito Obrigado Adrian !
Sua publicação é grande importância para possuidores do Icom IC-7300.
Parabéns pela Excelente postagem.
Ft3 73 PY5CV Cesar, desde Brasil
Thank you very much for your comments. Pleased you found it useful. 73 Ade
.
This is just what I looking for. Great Thanks.
73 de TA2TC
Thanks for the tutorial Adrian. Just what I needed to get the 7300 going! 73 de Dale