
Simple workshop technique that shows how to straighten Microbore copper tube using basic workshop tools
This post shows a technique I’ve used to straighten 10mm Microbore copper tube and forms one of a series of video’s I’ve made to show how I’ve constructed my Quadrifiliar Helix antenna or QFH as it’s more commonly known.
TOOLS REQUIRED
- Tube cutter
- Mold grips
- Lump hammer
- Fine grade file
- Flat file of smooth grade
- Marker pen
- Ruler
- Straight edge
- Calipers
- Bench vice
WASTE
This technique is not 100% efficient and will produce some waste but at the same time it does produce some good results using some basic workshop tools.
PURCHASING MICROBORE COPPER TUBE
10mm Microbore tube is usually sold in coils rather than straight lengths.
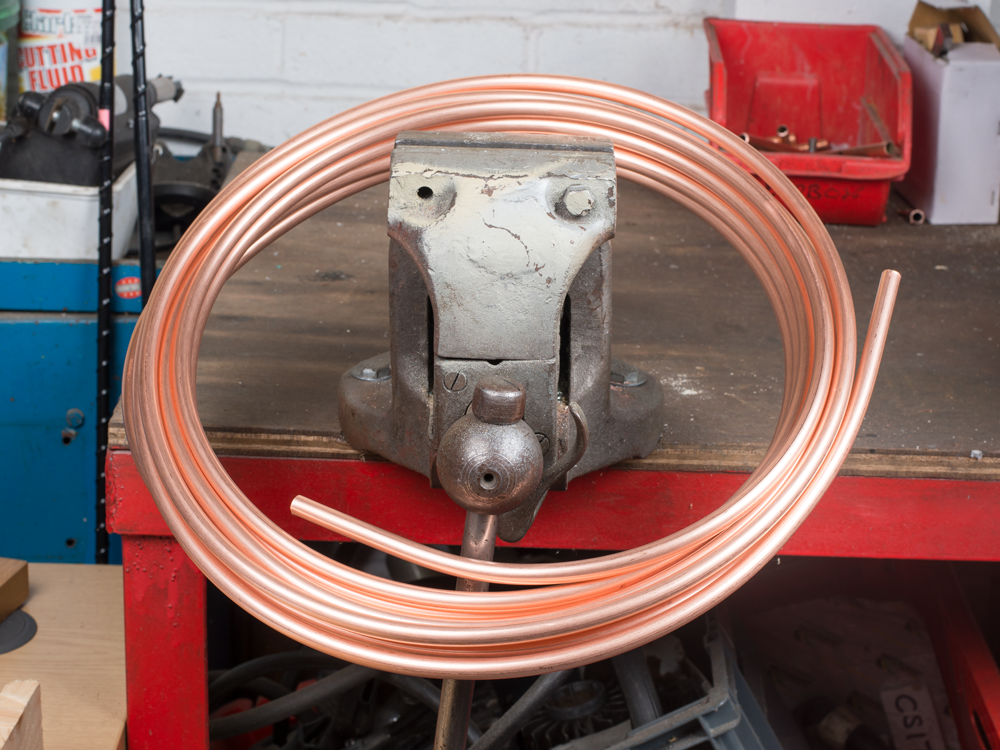
The first thing I do is carefully uncoil the tube by hand and lay it out on the floor. Despite best efforts it is very difficult to fully straighten the tube.
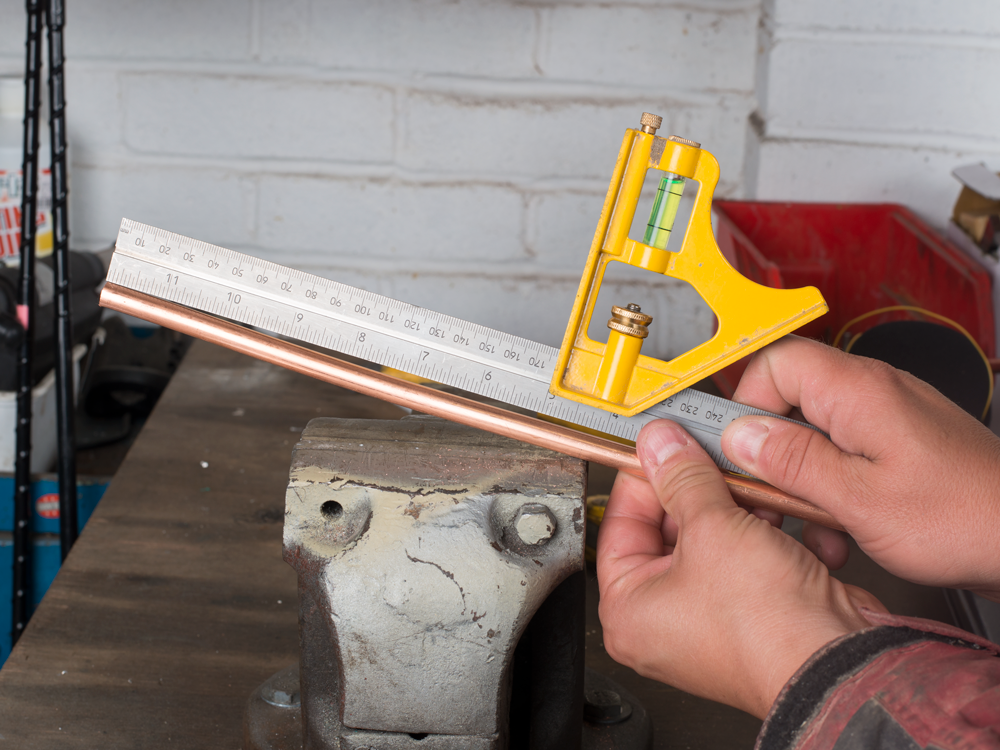
MEASURING THE MICROBORE TUBE
For one part of the antenna I need a piece of tube that’s 182mm long so I’ve added an additional 100mm and cut a piece that’s 282mm long from the uncoiled tube.
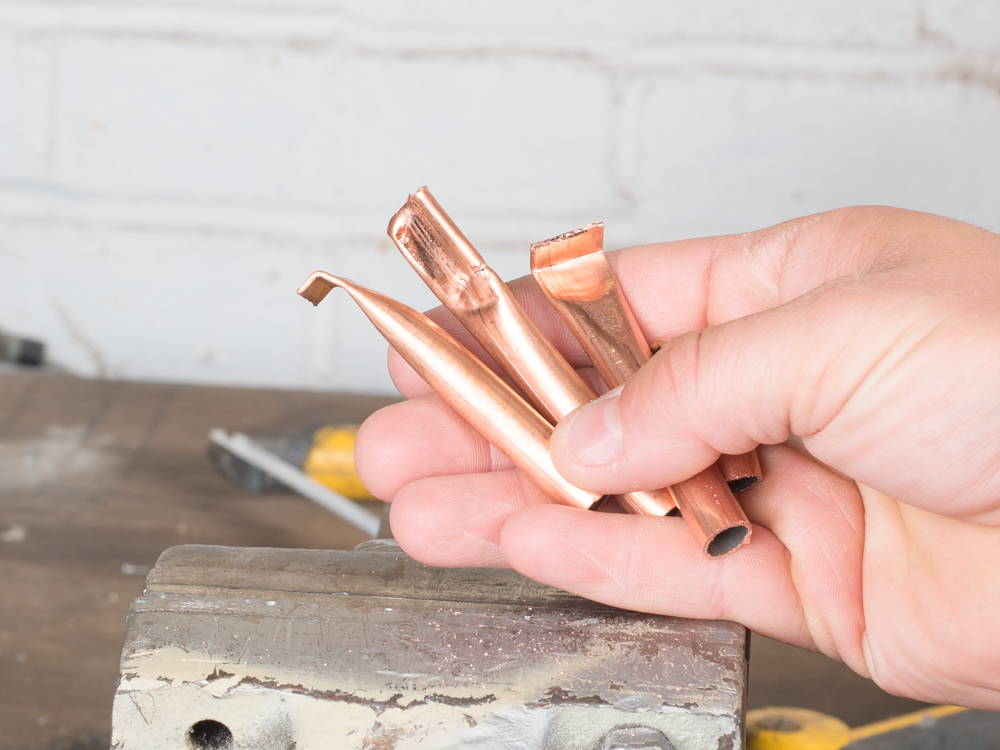
The reason I’ve added the additional 100mm is because this technique requires each end of the tube to be squeezed and the squeezing causes some distortion to the tube as you can see in the picture below.
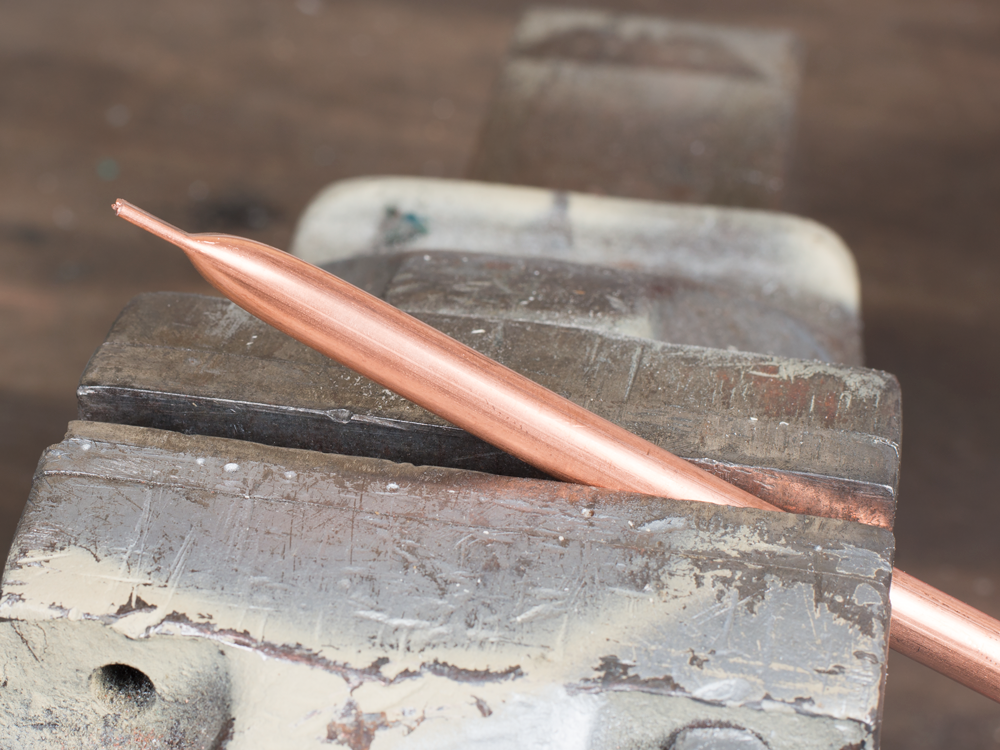
SQUEEZING & BENDING THE TUBE
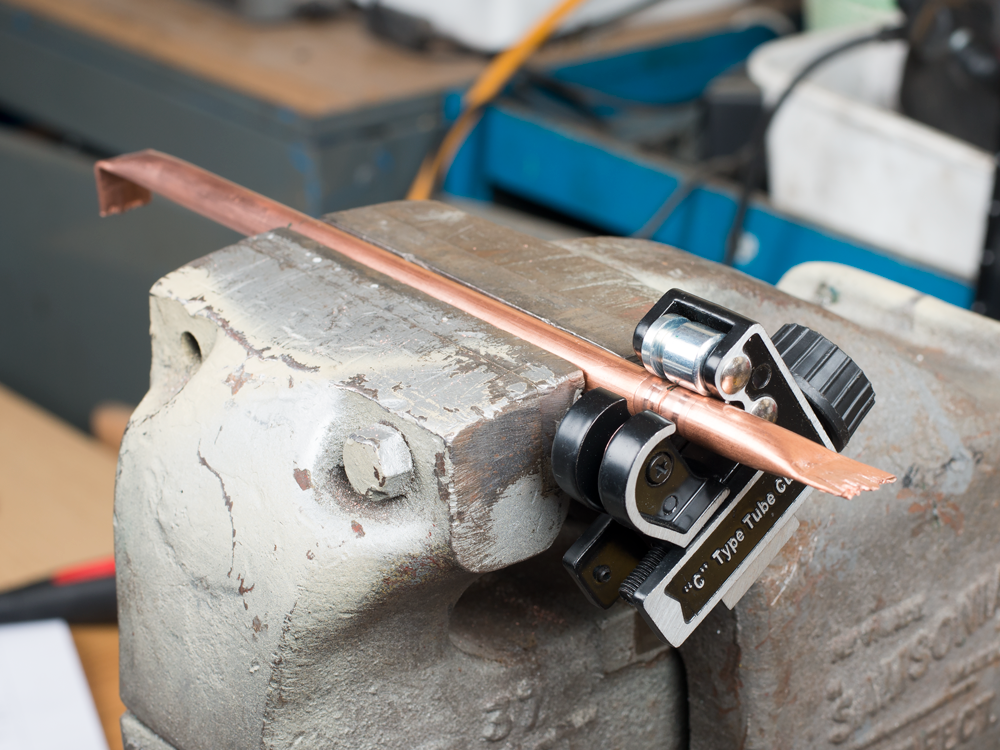
I place one end of the tube in the vice to a depth of approximately 10mm and tighten up the vice to squeeze the end.
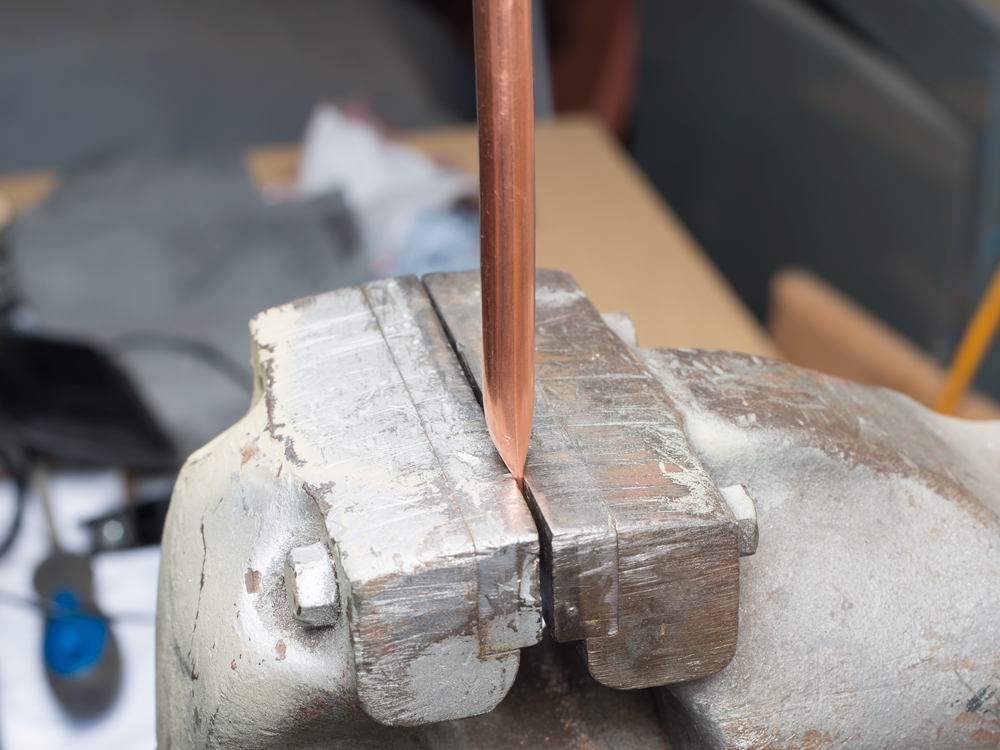
I do the same for the other end of the tube and bend the tube 90 degrees.
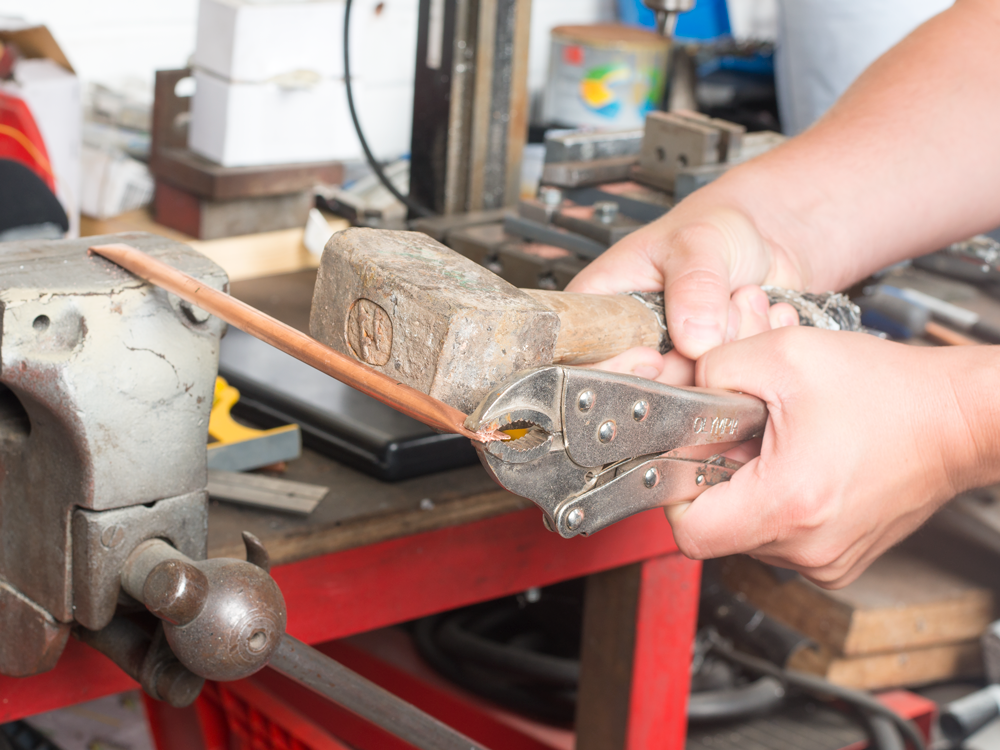
STRAIGHTENING THE MICROBORE COPPER TUBE
I attach some mole grips to one end of the tube and strike the mold grips hard using a lump hammer three or four times. You’ll usually feel the copper stretch out on the first or second hit. You need to be careful not to overstretch the tube.
CHECKING THE STRAIGHTNESS OF THE MICROBORE TUBE
I remove the tube from the vice and check the straightness using a straight edge. If your not happy with the straightness of the tube you can repeat the last step again.
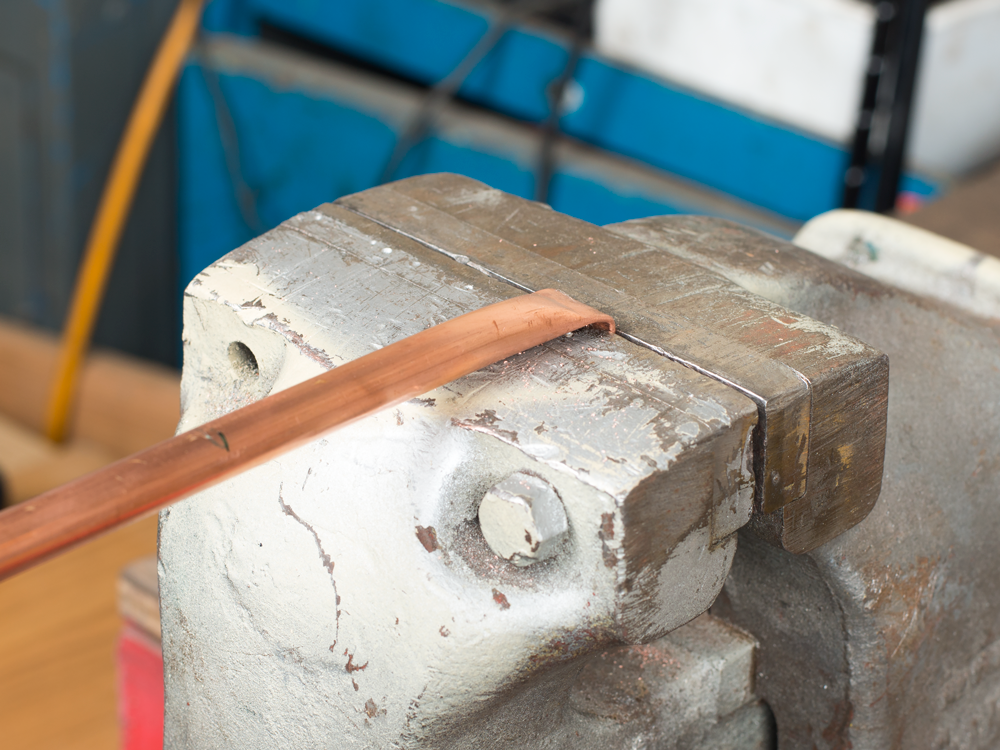
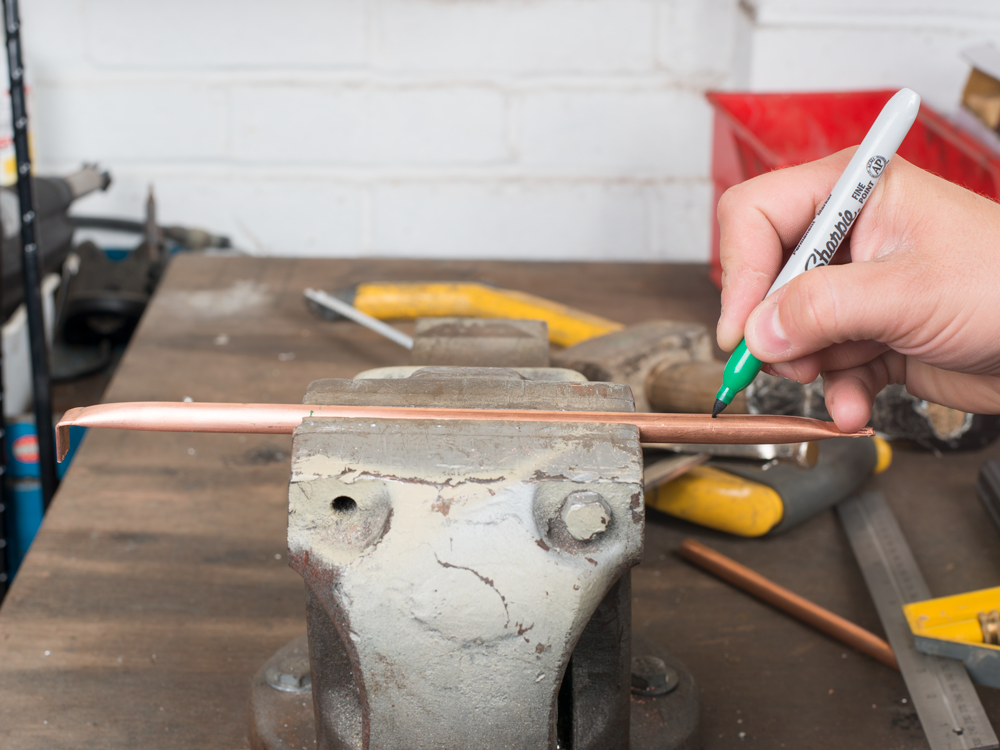
MARKING THE MICROBORE TUBE READY FOR CUTTING
Happy with the straightness of my tube I place it in the vice and tighten up just enough to hold the tube in place.
Using a marker pen I mark one end of the tube approximately 15mm from where the distortion finishes.
CUTTING THE MICROBORE TUBE
Using a tube cutter I cut off one the end of the tube.
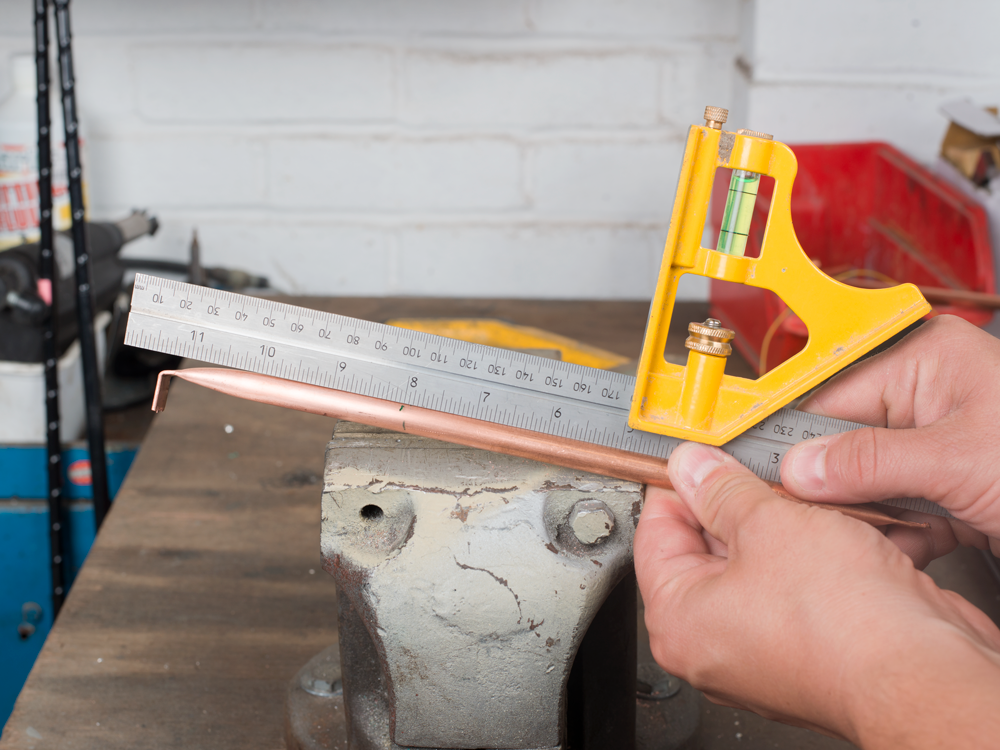
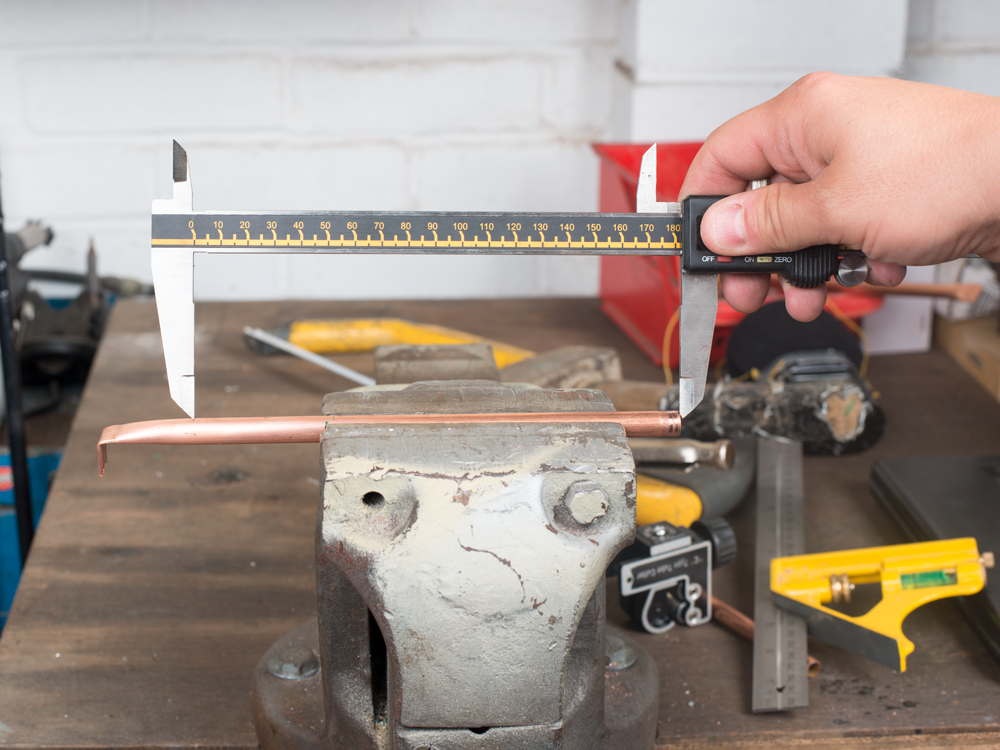
USING CALIPERS TO MAKE PRECISE MEASUREMENT OF THE TUBE
Using calipers I make a precise measurement of 182mm from the end of the tube.
CUTTING THE MICROBORE TUBE
Using a tube cutter I cut off the other end of the tube.

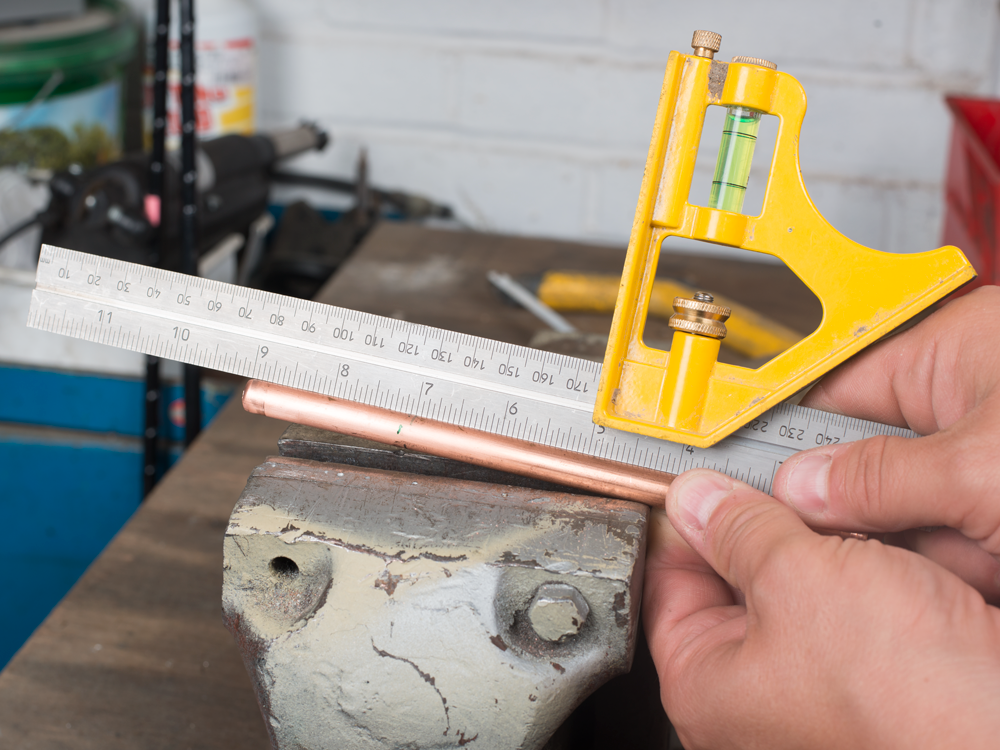
FINAL CHECK
Using a straight edge I check the straightness of the tube.
CONCLUSION
And that’s it, with the process now complete I now have a straight piece of tube 182mm long and can now use this for constructing my antenna.
Why not take a look at my YouTube channel here or Twitter posts here.
You can also register for my website here.
Thanks
73 de M0NWK
![]()


4 comments
Hi, I would like to know where I can see the videos of your QFH antenna build, I saw your youtube channel but I can’t find the videos regarding the antenna build. I saw the video about straightening the copper tube, it’s a very professional video and I would want to see the rest of the build. Thanks
Thanks for looking at my website. Unfortunately I have been delayed in finishing my QFH video but hope to have it released soon. Another few projects took precedence. Please subscribe to my YouTube channel and you will be informed when it is available. Thanks and 73 Adrian
Have you ever tried rolling the tube between two boards? Soft copper tubing used in plumbing is very easy to straighten, even in longer lengths. I use a board with some roughness to it so it won’t have the tendency to slip. Long pieces can be laid out on the floor so that it will spin as you roll a smaller area.
Hi Jay, yes I have used the rolling method and also rollers too. All three techniques have worked well. Thanks